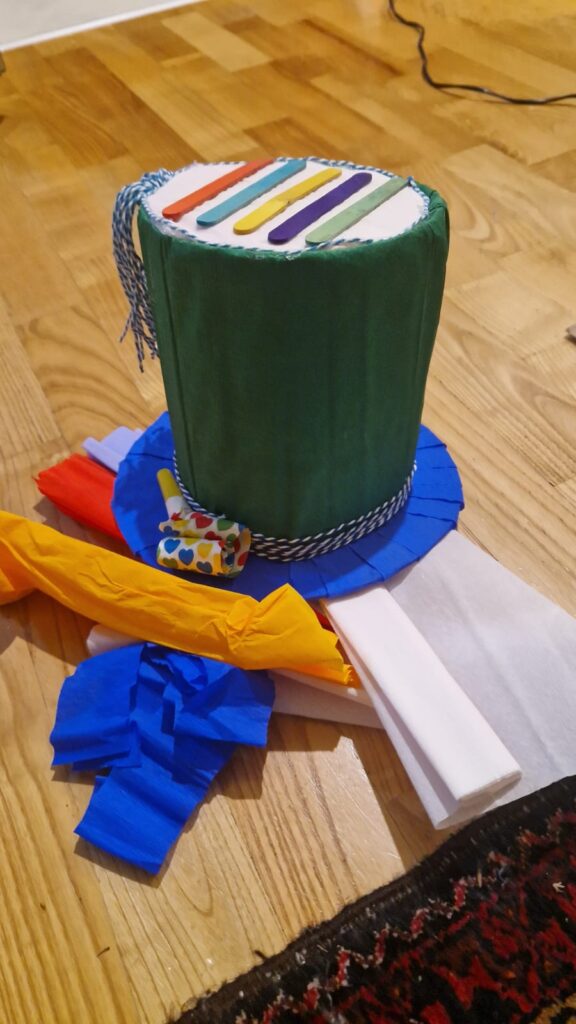
Colorful Hat for School Activity
Looking for a fun and creative activity for your kids’ school event? This DIY colorful hat is the perfect craft project that will keep your children engaged and let their imagination run wild. Follow these simple steps to make your very own colorful hat for any school activity or celebration!
Materials Needed
Before you get started, gather all the necessary materials:
- Cardboard
- Colored paper or tissue paper (red, blue, orange, white, green, black)
- Scissors
- String or twine
- Glue
- Popsicle sticks (various colors)
- Tape
- Decorative ribbons

Step-by-Step Instructions:
Step-by-Step Instructions
Step 1: Preparing the Hat Base
Cut the Cardboard: Cut out a circular piece from the cardboard for the top of the hat. This will form the main structure.
Wrap the Base: Cover the cardboard circle with green colored paper or fabric. Secure it with glue or tape to ensure it stays in place.
Step 2: Creating the Hat Body
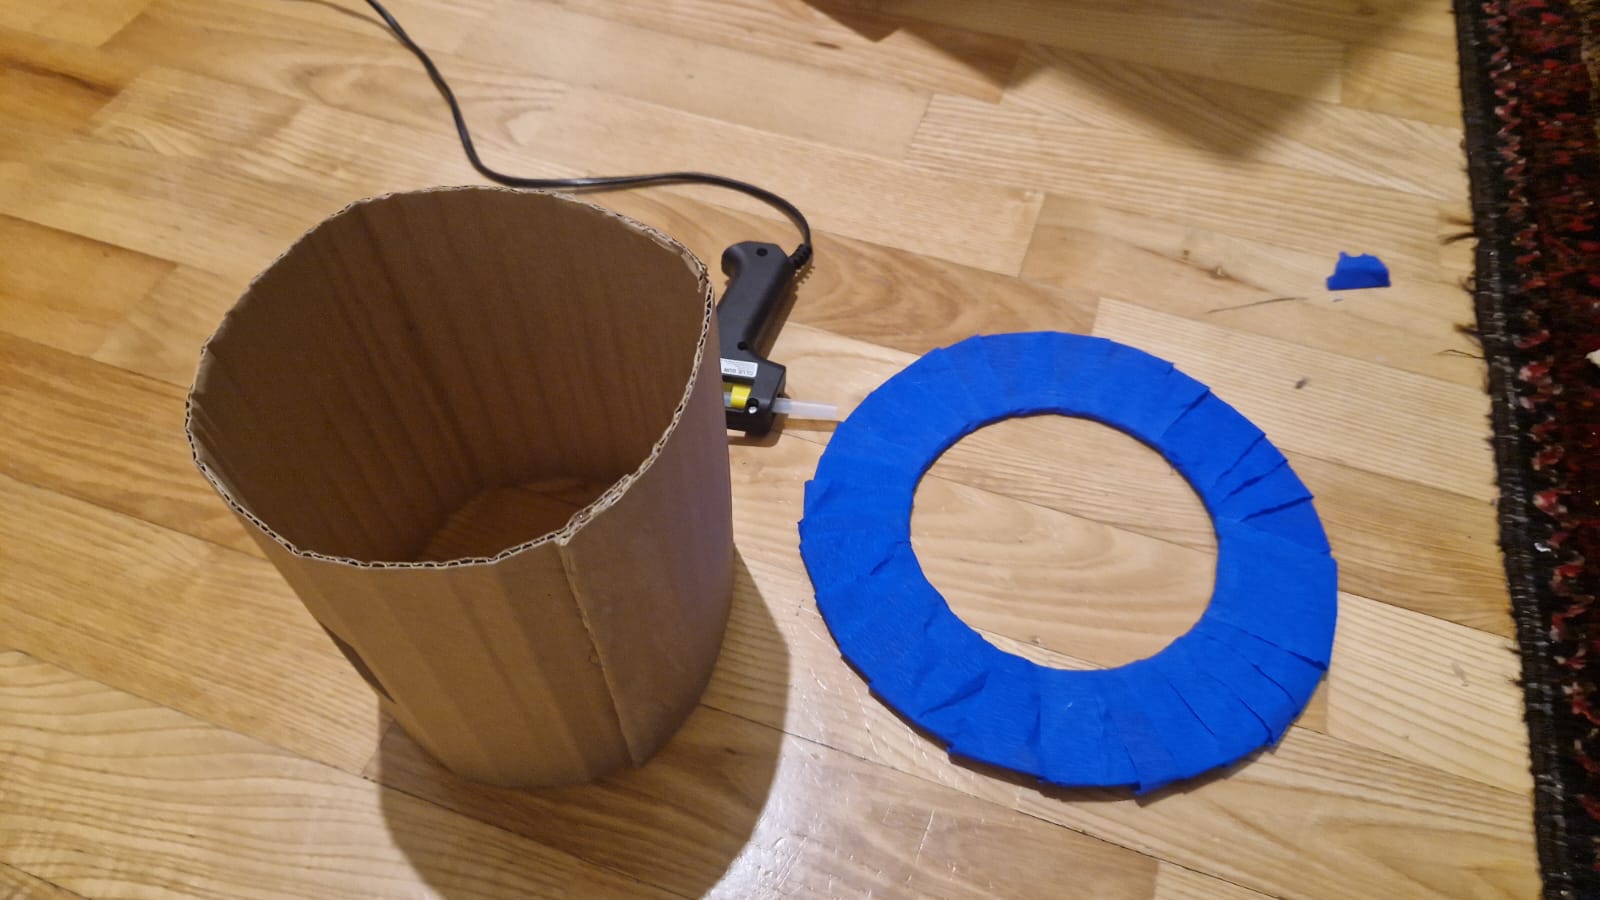
Roll and Secure: Roll a piece of cardboard to form the cylindrical body of the hat. Ensure it’s wide enough to fit the base you prepared.
Cover the Body: Wrap the hat body with green colored paper or fabric. You can use green to match the base or mix colors for a vibrant look.
Step 3: Adding the Hat Top
Top Surface: Cut another circular piece of cardboard for the top of the hat. Cover it with white paper.
Decorate the Top: Glue colored popsicle sticks on top of the white surface. Arrange them in a pattern to add a pop of color.
Step 4: Adding Decorations
Fringe and Ribbons: Use tissue paper to create fringes. Glue or tape them around the bottom edge of the hat body. Add decorative ribbons and twine around the hat to give it a festive look.
Final Touches: Add any other decorations you like, such as stickers or glitter.
Tips for Success:
Tips for Success
- Safety First: Ensure that children are supervised when using scissors and other sharp objects. Safety is the top priority.
- Be Creative: Encourage kids to mix and match colors and materials. Let their creativity guide the design.
- Use Non-Toxic Materials: Make sure to use child-friendly, non-toxic glue and materials, especially for younger children.
- Plan Ahead: Have all materials ready before starting the craft to avoid interruptions. This helps keep the kids focused and engaged.
- Keep It Tidy: Use a large sheet of paper or an old tablecloth to cover the workspace. This will make cleanup easier and protect your surfaces.
- Allow Drying Time: Be patient and allow each part of the hat to dry thoroughly before moving on to the next step to ensure everything stays in place.

And there you have it – a beautiful, handmade colorful hat perfect for any school activity! This project is not only fun but also a great way for kids to explore their creativity. They can wear their new hat to school events, parties, or even just for fun at home. Happy crafting!
Happy crafting!